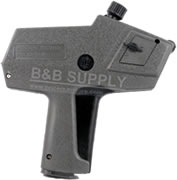
 Loading the Monarch 1110 labels into a Monarch 1110 is a process that may seem complex, but only takes a few steps complete and a few times to master. Follow this Monarch 1110 instructions guide and you’ll be back in business in no time. I would like to say that all new Monarch 1110 guns from reputable dealers do come with loading instructions included in the box. If you have just purchased an Monarch 1110 gun and instructions were not included with it, you may want to call the seller and ask why. All the Monarch 1110 guns we sell at B&B Supply have easy to follow loading instructions included.
Start by first tearing off the first 12 or so labels from the label roll. This will insure that the adhesive used to hold the first label to the roll will not get exposed to the inner workings of the gun. The adhesive could lead to a label jam in the future. Then snap the roll of Monarch 1110 labels into the back of the gun between the hubs. You want the labels to come off the top of the roll. Next pull and hold the hand trigger about half way. Pulling the hand trigger disengages the brake wheel and allows you to slide the label strip through the gun. Insert the label strip into the gun by basically following the plastic avenue you see. The Monarch 1110 labels should start to come out the front of the gun. Continue feeding until you have about eight inches hanging out of the front and release the hand trigger. Next, feed the label strip up under the black plastic plate in the front of the gun. The labels should start to come out the top of the gun by the application roller.
Once you have two labels coming out, squeeze the hand trigger half way again and rewind the roll of labels so the loop of labels is removed in the front of the gun and the labels are tightened up. Then grasp the two labels in the front of the gun and quickly pull the strip downward toward the hand trigger. This process will remove the labels from the backing paper. You will want to have about seven inches of just the backing paper now. Hold the Monarch price gun upside down and squeeze the hand trigger all the way exposing the feedwheel. Feed the backing paper into the slot with the arrow until you feel tension from the feedwheel. Start squeezing the hand trigger several times to tighten up the paper. If the wheel does not grab the backing paper right away, keep feeding it into it. Turn the gun right side up after the backing paper first grabs. After about six or seven clicks, printed labels should start coming out the front of the gun. Try to always make sure that only backing empty backing paper (with no labels) travels down the gun and gets grabbed by the feedwheel and goes out the back of the gun. Jamming could result if labels are pulled through the feedwheel.

